
How to run a Linux distribution in a container
Page created January 17, 2021. Updated April 25, 2021
This tutorial is written in the first-person by Barry Kauler (BarryK on the forums). Switching to first-person mode now...
EasyOS is able to run an application in a container, but can also run
a complete Linux distribution. This web page introduces containers from
a user-perspective:
https://easyos.org/user/using-easy-containers.html
...which shows an example of a complete distribution desktop running
in a container. There is also developer-perspective information on
compiling source code inside a container.
The page that you are reading now is very much developer-perspective,
looking at how a different Linux distribution can be converted to run
in a container in EasyOS.
So far, I have only done this with various Puppy Linux derivatives,
as the 'dir2sfs' conversion script is aware of certain Puppy features.
However, in theory, any Linux distribution can be converted.
| NOTICE: In theory any Linux distribution, however, currently the dir2sfs script is only supporting Puppy Linux derivatives, as it makes certain assumptions about the system architecture. |
The case study for this page is for 64-bit EasyOS running on the
Raspberry Pi4, and to convert RasPup to run in a container. At the time
of writing, EasyOS for the Pi4 is version 2.6.1, see blog post.
| CLARIFICATION: A container is not a virtual machine. What this means is you cannot run a different architecture from the host system. Yes, if the host system is x86_64 (64-bit), then you can run either 64-bit or 32-bit x86 OS in a container (but not the reverse). Same for ARM, a ARM64 host can run either 64-bit or 32-bit ARM OS in a container. However, you cannot run an ARM OS in a container on a x86 host, nor vice versa. |
Hence, to run RasPup in a container, you must be running EasyOS on the Pi4. Onward ho...
RasPup
This is an "official" Puppy Linux release, that runs on all Pi
boards, from the Pi0 to the Pi4. It was created by Michael Amadio
(01micko on the forums), and is built in woof-CE with Raspbian Buster
DEB packages. The architecture is "armhf", 32-bit. Here is the project
home:
http://raspup.eezy.xyz/index.php
Forum discussion:
https://forum.puppylinux.com/viewforum.php?f=141
Version 8.2.1 is here:
http://distro.ibiblio.org/puppylinux/arm/puppy-raspup-8.2.1/
Note that Michael also has a blog:
After downloading 'raspup-8.2.1-a60dc46d9-2gb-f2fs.img.zip' and
'raspup-8.2.1-a60dc46d9-2gb-f2fs.img.zip.md5.txt', I was ready to do the
conversion...
Extracting the rootfs out of the image
'dir2sfs' is a script that does the conversion. It is very easy to
use, however, there are some choices that might not be obvious, hence
this tutorial is useful. What 'dir2sfs' needs is a folder with the
"rootfs" in it...
Firstly, I extracted 'puppy_raspup_8.2.1.sfs' out of the downloaded
file. You could expand the downloaded file, then mount the first
partition, or write the file to a USB-stick. Whatever, you need to
extract that SFS file. I did the latter.
If you are running Puppy or EasyOS, you can just click on an SFS to
mount it and see the contents. Other Linux distros, you will have to use
something like "mount -t squashfs <sfs file> <mount
point>". Itemising the steps:
- So, I clicked on 'puppy_raspup_8.2.1.sfs' to mount it, then created a folder elsewhere, named 'raspup_8.2.1_armhf'.
- I opened a terminal and copied all the files from the SFS into 'raspup_8.2.1_armhf':
# cp -a * /mnt/sda1/downloads/downloads2/input568/0-raspup/raspup_8.2.1_armhf/
# sync - I closed the terminal window, and clicked on the SFS again to unmount it.
I now have a folder with all of RasPup inside it. There is however, one little glitch:
'dir2sfs' tries to find the logo image for raspup, however, in this
case needs some help. The script will find 'raspup48.png' in
user/share/pixmaps, which is not a suitable logo.
raspup_8.2.1_armhf/usr/share/pixmaps must contain 48x48 'raspup.png' as
this will be used as the desktop icon -- i got this from the RasPup
homepage online. I also replaced 'raspup48.png' with this correct logo,
as 'dir2sfs' will also consider this a the logo candidate.
dir2sfs
Now to actually use 'dir2sfs'. As input it requires a folder of the
format 'name_version[-revision]_arch'. I launched the script:
# dir2sfs raspup_8.2.1_armhf
A series of GUI windows pop up, this is the first:
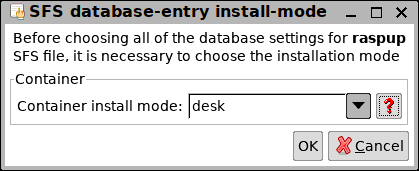
...I chose "desk", because we want to run RasPup as a complete desktop.
in the next window, "SFS package database-entry creator" window, fill
in as appropriate. Note, "Dependencies" must be empty, and "Repository
path" set to "puppy/debian/buster":
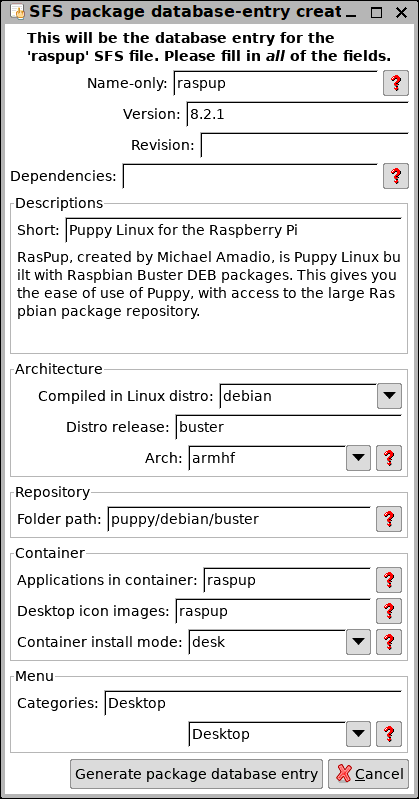
That Repository Folder path is of the form
"distro/compatible-distro/compatible-release". In this case, it is a
Puppy, built with Debian DEBs, version buster.
| WARNING: It is important that you get this path correct! Another example: the if EasyOS Buster-series is to be run in a container, the path will be easyos/debian/buster. Look at /mnt/wkg/sfs to see the currently available paths (ignore the 'settings' folder). Or, look online at http://distro.ibiblio.org/easyos/amd64/packages/sfs/ |
One more important point about the above window:
| DEPENDENCIES: The Dependencies field must be empty. This is because no other SFS files are required to be loaded. The RasPup SFS is a complete OS. |
The next window has security choices. This window is likely to
undergo changes in the future, but for now, this is what it looks like:

...I clicked the "Expert" tab, then chose "Xephyr" X server. left all
the others as-is. Note that Xephyr is required, as RasPup is going to
run as a desktop filling the screen, not in a window.
That's it, 'raspup_8.2.1_armhf.sfs', 'raspup_8.2.1_armhf.specs' and 'raspup.png' have been created.
I then uploaded to the EasyOS SFS repository:
http://distro.ibiblio.org/easyos/aarch64/packages/sfs/puppy/debian/buster/
That's it from the developer-perspective. Now look from the user viewpoint...
The next section is explaining how to use "sfsget" on the desktop to
download and install the container. However, if you have created your
own OS SFS file, then it will already be downloaded. If you want it on
the online repository, I would have to upload it for you.
No problem, you can test it locally! Just copy
'raspup_8.2.1_armhf.sfs', 'raspup_8.2.1_armhf.specs' and 'raspup.png' to
/mnt/wkg/sfs/puppy/debian/buster. Ready to go, "sfsget" will recognize
it, and you will be able to install it.
However, in the following tutorial I did upload it, and it wasn't local, so as to go through the whole download-then-install steps...
sfsget
The link at the top of this page explains how to use "sfsget". Just summarizing here:
"sfsget" is an icon on the desktop. Click on it and you can download
and install an SFS file, either to run in the main desktop, or in a
container.
So, I went through the exercise, clicked on "sfsget":
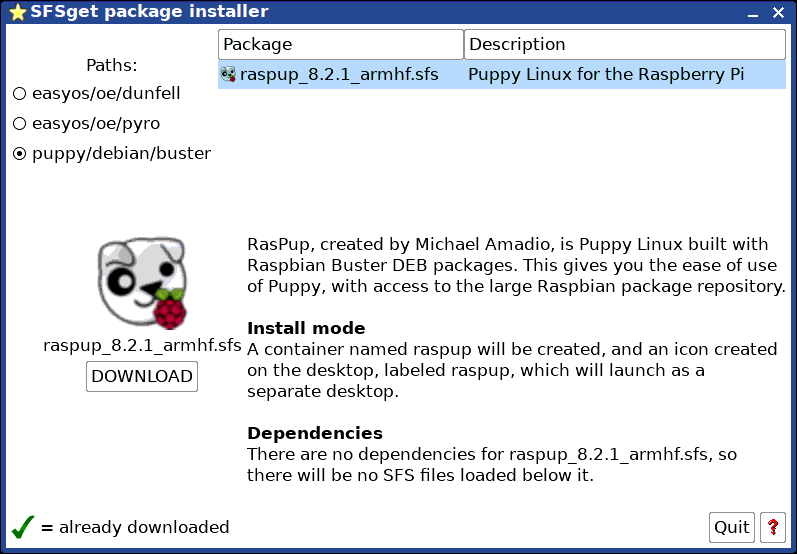
The SFS file downloaded, then got the next window:
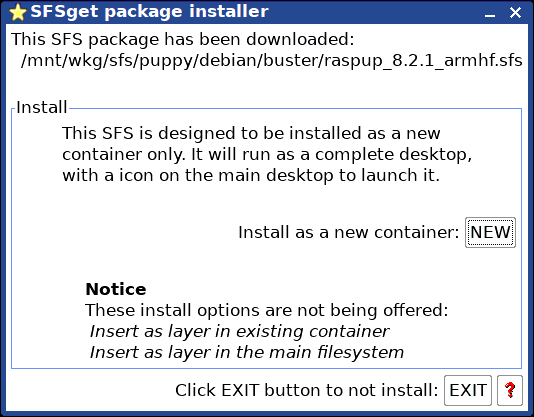
...clicked "NEW", that's it, an icon appeared on the desktop, joining the other containers:
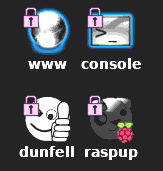
I clicked on "raspup" and the screen flipped over to the RasPup desktop. There is a message on the screen that "ALT-F6" will flip back to the main desktop. Yes, can flip between the two, it is great, never tire of doing this!
Tags: dev